Intro
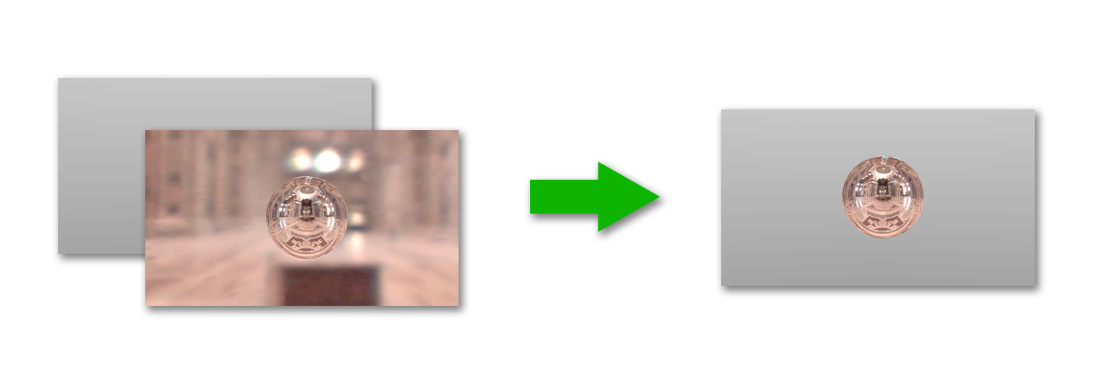
This is just a quick post (I hope) with a tip on how to render a different background when using HDRI lighting in Blender 3D. As you can see from the images on my gallery I generally just render a single object and don't really make a scene for it. The downside of this is that if the object is reflective it doesn't have anything to reflect in the empty scene and looks plain and unrealistic.
Like others, to get around this problem I use HDRI maps to give fake reflections. The problem with this is that you then have the HDRI image in the background which can take focus away from the original image, to get around this you can make a plane in the background which blocks out the HDRI image, but it often has to be quite large to fill the whole camera background.
A workaround which I use is to use the Blender's compositor to composite in a different background from a different scene in the blend file. Of course this could be done afterwards if you just rendered a PNG with transparent background, but if your not intending to do any post on it anyway you might as well do this in Blender. For example, I normally use a simple blended background found in the 'World Settings' giving a gradient effect, which I would rather use than the HDRI background but still have the benefits of the reflections the HDRI provides.
The Method
To set this up (explanation image shown below):
- Set up your HDRI background as normal
- In the render settings choose 'Premultiplied' rather than 'Sky' for the 'Alpha' option in the 'Shading Panel' OR tick 'Convert Premul' in the 'Alpha Over' node.
- Create a new scene with the with a background chosen in the world settings (you will also have to create a camera for it to render) or optionally choose an image of your choice which you would like to be the background. (all that would be different is that in the image below you would simply Input> Image rather than Input> Render layer as show below).
- Set up the nodes in the 'Node Editor' to composite the 2 layers together, shown below. (make sure to choose your other scene in the Render Layer node).
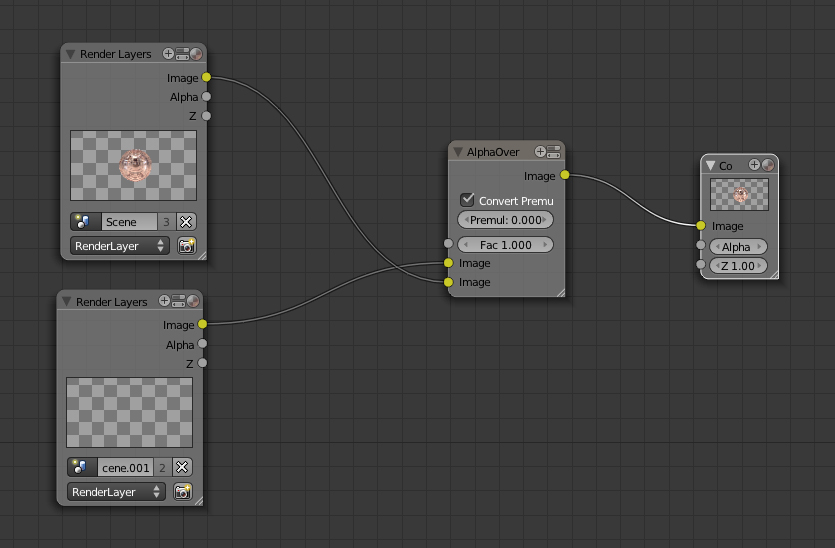
Click for a larger image.
One thing to note is that for some reason the second render layer may appear to be blank if your just using the other scene's world settings, showing the tiled background, but if you attach a viewer node to it it should appear in the backdrop as normal. If it doesn't then go into the other scene and render the background then switch back to this scene. Even if you can't get it to appear it should still work.
Hope I explained this well enough, let me know if you have trouble.
Ray.