This post is mainly about using the Shrinkwrap modifier for modelling, which is below, but there's also a quick update on some of my projects right at the end.
My Favourite Modifier
Before I started the 'Heartbreaker' project I probably wouldn't have said that the Shrinkwrap modifier is one of my favourite modifiers in Blender (not that anyone had actually asked me, or likely ever would). Maybe in the top 10, but only just. I would probably have gone for one of the classics, like the Subsurf or Mirror, you just can't go wrong with those two. However, that's all changed. If anyone ever asks me*, I will say my new favourite modifier, at least regarding modelling - which is what I'm doing most of the time - is the Shrinkwrap. It has become my go-to, problem solving, reliable friend.
*Which they wont.
Are You Insane? And What Does The Shrinkwrap Modifier Even Do?
No, I am not. A valid question (the second one), thank you (me) for asking. In its simplest form, the Shrinkwrap modifier is tasked with snapping the current object onto the surface of another object. It also has the ability to only snap specific vertices if you specify a vertex group.
Here we see a simple subdivided plane being shrinkwrapped to the surface of a sphere:
A simple, but I'm sure you'll agree, *Powerful* example.
I think the Shrinkwrap modifier was probably first created as a retopology tool, the snapping allowing you to easily create new, low-poly geometry, over your high-res model, without having to constantly think about manual snapping. Considering this, I'm not sure that 'Shrinkwrap' is actually the best name for it; maybe 'Snap' would have been better. The Snap modifier has a ring to it. But then, who am I to start renaming things? Sure, I was technically the best renamer in the area of Greater London in the years 1993 - 1998*, but I have no official certification for that, so I'll leave actual naming and any subsequent renaming to those that do.
*I retired from the gruelling world of competitive renaming undefeated and vowed never to return, due to the physical stress it caused my body.
How Does Retopology Tie-In To Hard-Surface Modelling? Are You Sure You're Not Insane?
It's not so much that retopology fits into hard surface modelling it's more that some hard-surface modelling scenarios and retopology share some common needs. Also, please stop asking if I'm insane.
There are two scenarios that can be very time-consuming when modelling:
- You have several meshes that all need to conform to the same profile (meaning surface curvature).
- You need to edit or add additional details to a curved surface.
This is very similar to what retopology requires and these two problems both happen to be the Shrinkwrap modifier's strength: conforming vertices to a specific surface.
That's All Well And Good, But Show Me Some Specific Examples
Please don't be so demanding. I've got some examples from 'Heartbreaker', the project I just literally won't shut up about.
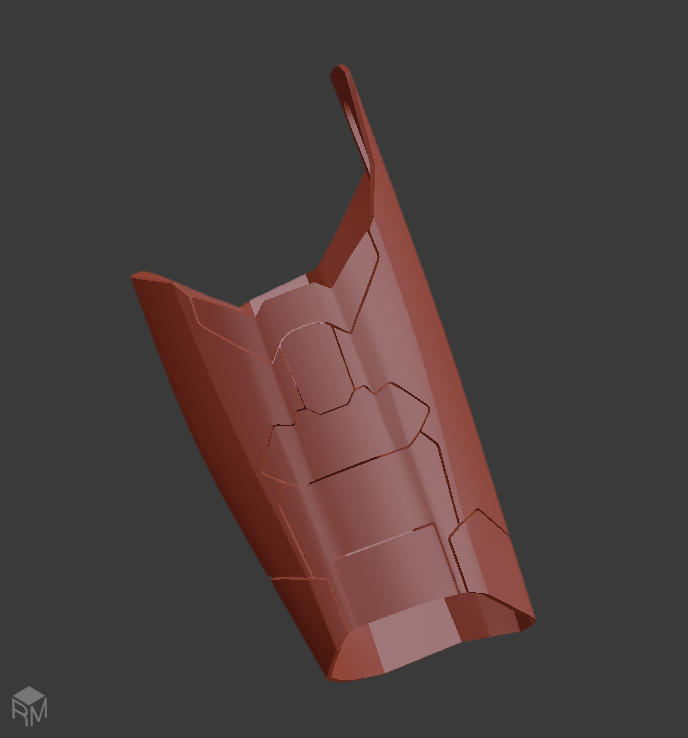
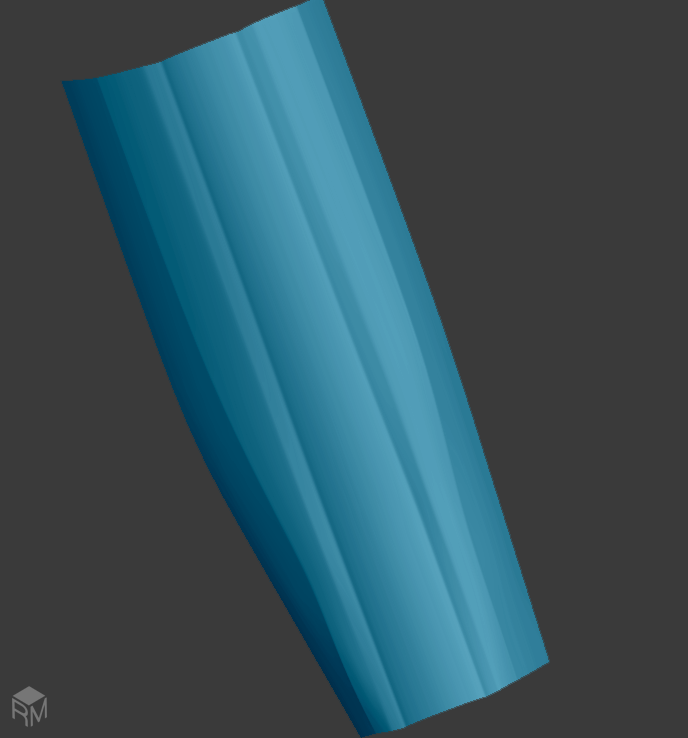
The 'Heartbreaker' Iron Man suit has a tendency to have many separate panels that all conform to the same profile. Below, on the left, is the forearm, which is made of many pieces. They all have the same bulge and crease going through them, which would be time consuming to model manually. Instead, I built one continuous surface to describe the surface I want my mesh to conform to, shown on the right. All the pieces on the left conform to the profile of the mesh on the right (the Shrinkwrap target):
Heartbreaker also has many examples of detailing cut into curved panels. Cutting into curved surfaces is notoriously difficult as any sharpening edge loops on those details end up causing undesirable pinching, particularly at corners. It's also very difficult to perfectly maintain a curved surface while adding in new geometry.
Here, the head remains perfectly curved despite having cut details into it, thanks to good ol' Shrinkwrap:
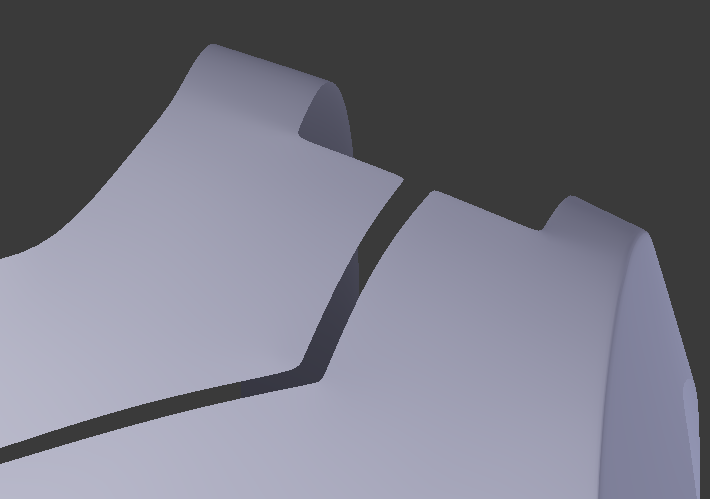
Here is a wider view of the top of the head on the left, with its Shrinkwrap counterpart on the right:
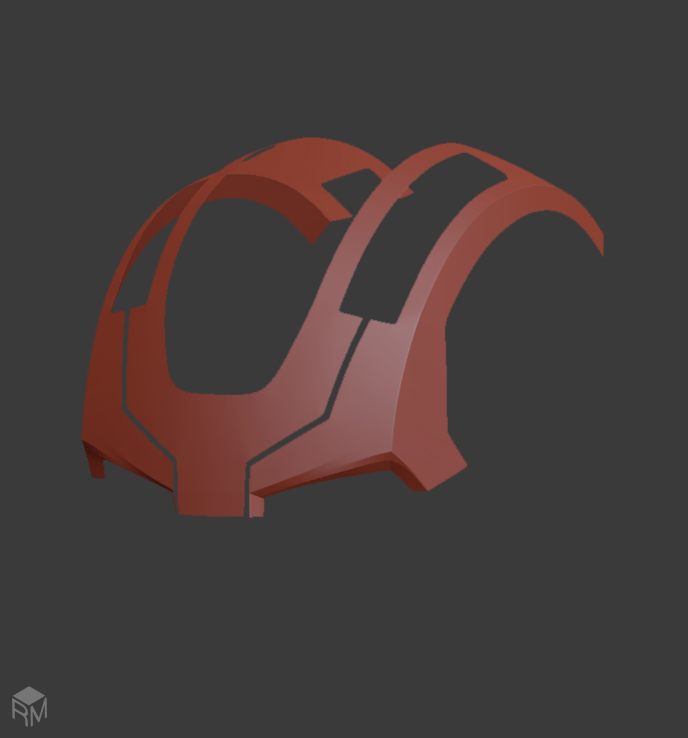
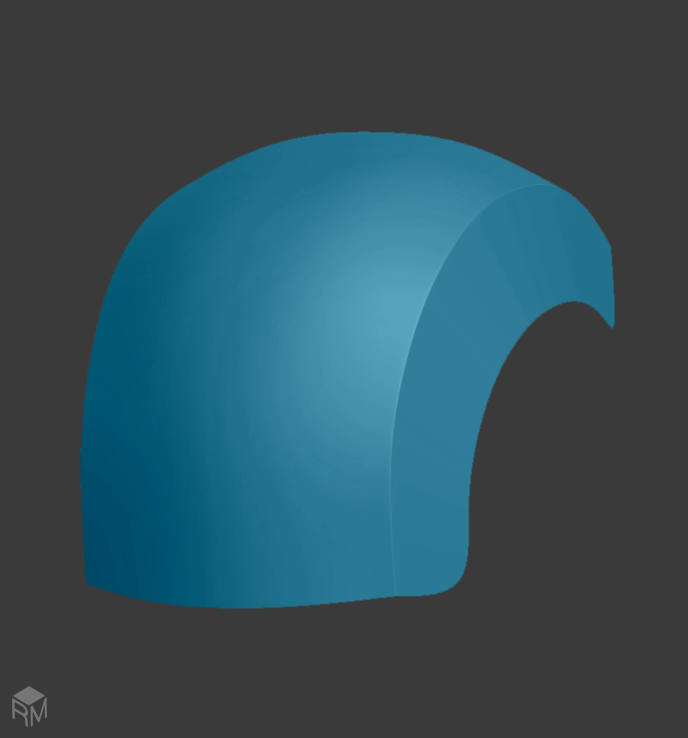
The 'eyebrows' in the above image were excluded from the Shrinkwrap by adding all vertices apart from the eyebrow to a vertex group and selecting it on the Shrinkwrap modifier.
The Process
- Model a simple mesh that describes the curvature you want your mesh(es) to follow*.
- Add a Shrinkwrap modifier to the mesh(es) you want to conform to your Shrinkwrap object.
- Select the Shrinkwrap object as the 'Target' on the Shrinkwrap modifier.
- If you only want to Shrinkwrap part of your mesh, then create a vertex group that contains all the vertices you want to effect and select that vertex group on the modifier.
- If you want, repeat the previous steps to add multiple Shrinkwraps.
*If I've already started modelling something, but decide I need a Shrinkwrap, I will sometimes duplicate the object I'm modelling, simplify it, and use it as the Shrinkwrap object.
I also like to change the 'Maximum Draw Type' to 'Wire' in the 'Display' panel of the 'Object' tab in the 'Properties Editor' for the Shrinkwrap object so you can see the object you are modelling as well (shown below). Also, you may find it useful to turn on 'Draw All Edges', also in the 'Display' panel and 'Optimal Display', on the Surbsurf modifier, if you're using one.

'Maximum Draw Type' set to 'Wire', 'Draw All Edges' and 'Optimal Display'.
When One Shrinkwrap Just Isn't Enough
Sometimes, creating a good enough Shrinkwrap object would be as complicated as modelling the original object, so not only will I sometimes use several Shrinkwrap objects (instead of one big one), but some of those Shrinkwrap objects have Shrinkwrap modifiers themselves. It's like needing to build scaffolding to be able to build more complicated scaffolding to be able to build the final object.
Here, for example, is the chest piece from Heartbreaker. It's probably the single most complicated piece in the whole suit, shown with all 9 of it's Shrinkwrap objects:
The key to this is vertex groups. Each Shrinkwrap object above is responsible for only part of the mesh.
Nobody's Perfect
Despite the unrivalled awesomeness of the Shrinkwrap modifier, it does have a problem, but it can be worked around quite easily.
When you're moving the vertices of an object that is Shrinkwrapped, what you're seeing is the vertices moving along the surface of the Shrinkwrap object. What's actually happening is that you're moving the vertices in 3D space. This causes the Shrinkwrap modifier to sometimes have a hard time determining which part of the surface the vertices should be on if the vertices are actually very far away from it in 3D space (which can happen when editing the mesh). The vertices will snap to the surface, but might not move smoothly. A quick fix for this is to press the 'Copy' button on the Shrinkwrap modifier to create a duplicate and then press 'Apply' on the copy. You have now applied the effects of the modifier and the vertices are now close to the surface again, allowing smooth movement.
The same 'Copy' and 'Apply' process also needs to be done if you find loop-cut-and-slide, vertex-sliding or other modelling tools start to position vertices weirdly. For example, with vertex-sliding, the vertices will slide dependant on where they are in 3D space, which isn't necessarily where they visually appear to be.
One other thing is that the Shrinkwrap modifier should probably be before any Subsurf modifiers you might have on the object. If you have a Subsurf first then you're giving the Shrinkwrap more vertices to play with than actually exist. This will only be problematic if you want to eventually apply all the Shrinkwraps on the object though.
The End, Finally
You may think using this technique only applies to specific objects or tasks, but I have found myself using it on many projects and I now can't do without it, so give it a try and let me know how it goes.
As a reward for getting to the end of this post (if you just scrolled all the way down without reading DO NOT LOOK BELOW AT THE REWARD, IT IS NOT FOR YOU), here is the entire 'Heartbreaker' suit with all 113 of it's glorious Shrinkwrap guides:
Embrace the Shrinkwrap modifier, love it, cuddle it, hold it at night, whisper sweet nothings into its ear and thank the gods it exists.
A Quick Update On Other Projects
I haven't got much done regarding 'Heartbreaker' so no update on that, other than I'm now working on fixing the upper-back, which I think is the last major part to be redone.
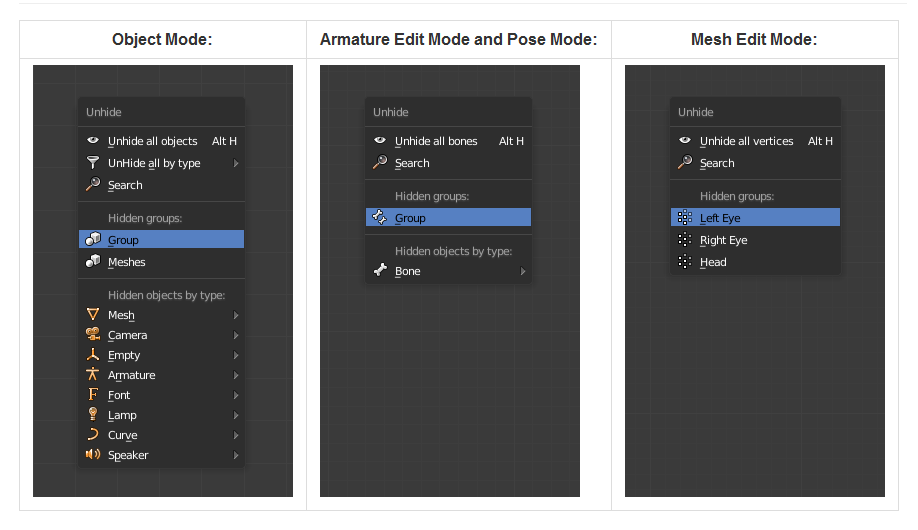
A quick update on 'Selective-Unhide', my unhiding add-on, is that it now supports not just Object Mode, but also Armature Edit Mode and Armature Pose Mode for hidden bones and bone groups and Mesh Edit Mode for hidden vertices:
Still a few things to do on it, I think, but they're relatively minor.
Ray.