This is what I've nicknamed 'Material Booleans', but they're really just masks that can be manipulated a bit like booleans, in that they can be moved like 3D objects and added or subtracted from one another.
I've been using them in a project where I have a wall I built with Geometry Nodes, and I want to punch a hole through it for a window. The problem? Well, if I want to use traditional, geometry-based booleans, I've got to convert the Geometry Nodes wall to a mesh, losing all the optimisation I had from using instances. (Even the newer 'Manifold' boolean option doesn't help that much with speed in this case.)
A simpler method could be to use a shader based solution, by using a mask on the material, or even better, a 3D mask that can be easily manipulated in the viewport. You'll notice that the 'boolean' is making a hole through multiple objects, each with different materials:
How it works
Every material that you want to punch a hole through shares the same node group. Because of how node groups work, anything that is done inside this node group is shared by all the materials that use the group. This way, a mask created inside the group is shared between multiple materials.
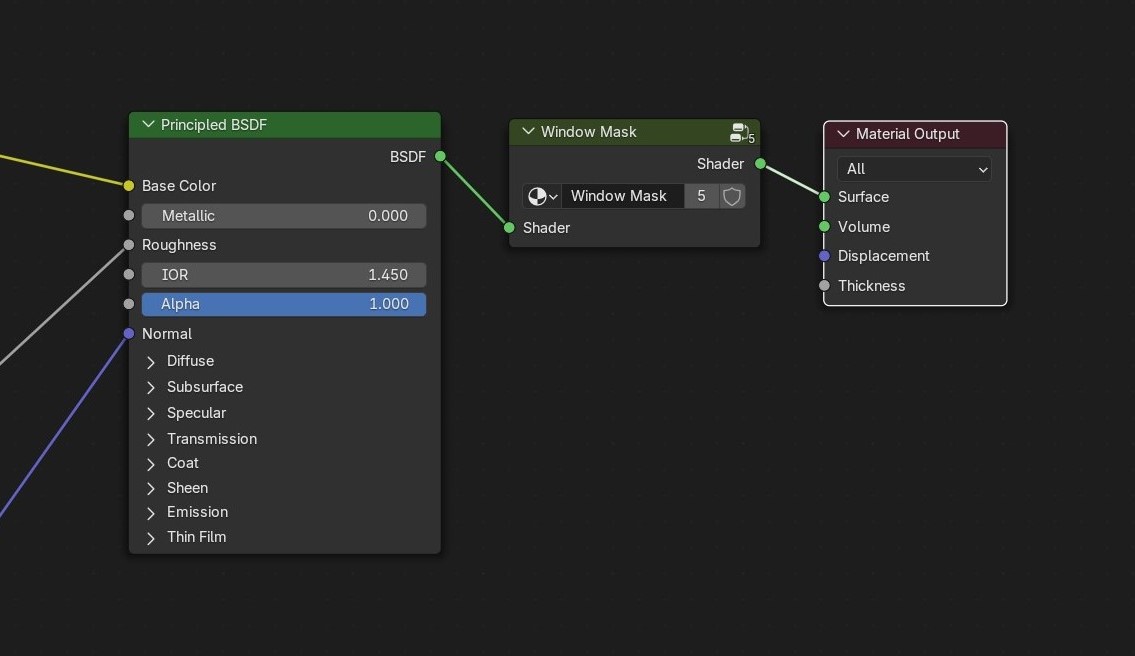
The mask node group mixes the incoming shader with a transparent shader using the mask. Everything inside the mask becomes transparent.
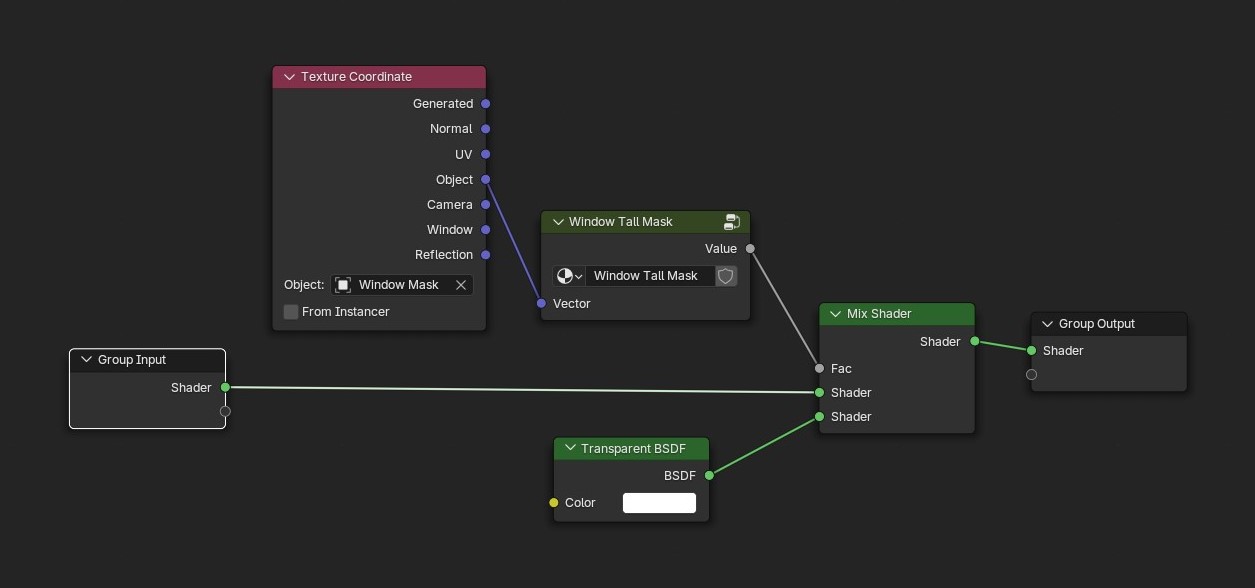
But what actually is the mask? Well, it could just be a regular black and white image texture. You can see that the mask above references an empty in the Texture Coordinate node. This vector is the coordinate used for the mask. This means that when the empty moves, the texture does too. But instead of using a 2D image texture, a better method might be to use the empty's Object Coordinates themselves to create the mask procedurally. Using a bit of maths you can manipulate the Object Coordinates to create basic procedural shapes. And because the empty has a 3D coordinate you can make 3D shapes, which can then be used as a mask.
For example, you can create a cube mask by manipulating the Object Coordinates like this:
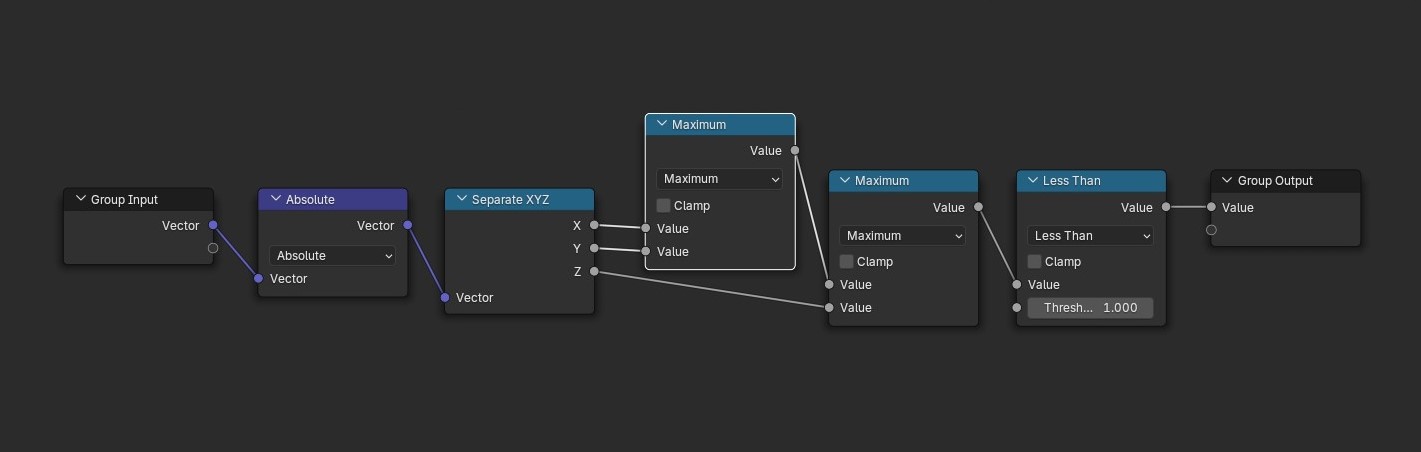
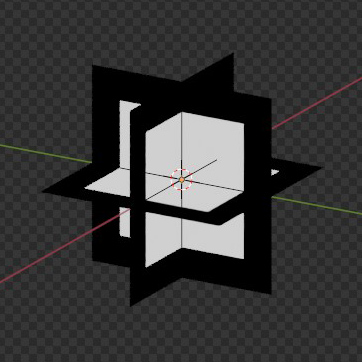
Which, when displayed on two intersecting planes, with the empty in the middle, results in the following mask:
The maths for this was adapted from examples from https://thndl.com/square-shaped-shaders.html. There are also more examples here, which will allow you to make different shapes. It can be a bit tricky to convert the maths into Blender nodes, but you can find things like this by looking up 'SDF shapes' or 'GLSL shapes'. Even if the resources you find aren't related to Blender, they can often be translated to nodes because they are using the same mathematical functions that Blender uses.
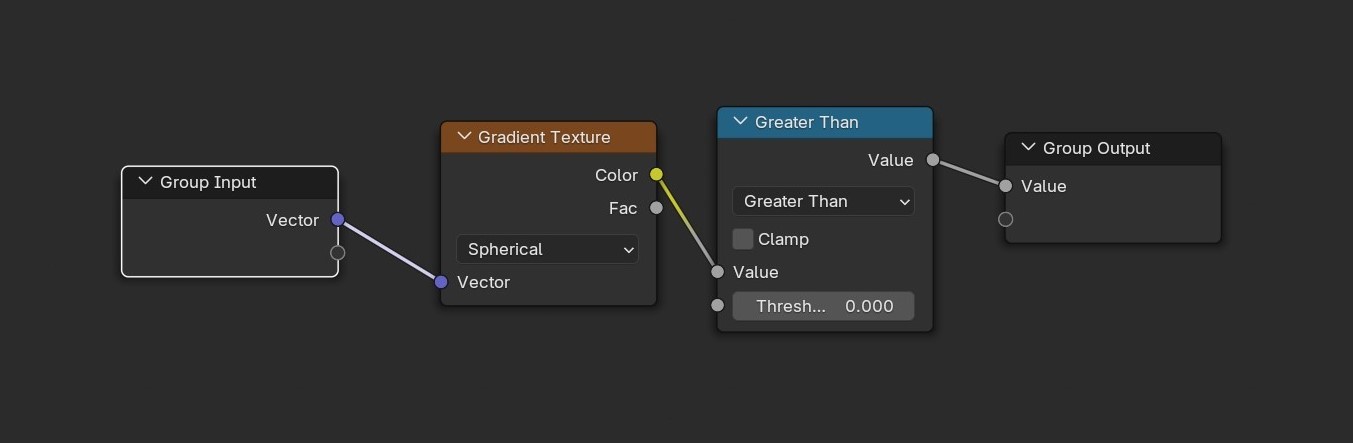
A sphere mask is a little simpler as you can use the Gradient Texture node:
Because you're using the empty's Object Coordinates, you can transform the empty however you like and the mask will stretch and rotate to match it. To help even more, you can change the display types of the emptys to have 'Cube' and 'Sphere' display types to match their mask shapes exactly. You can see an example of this in the video at the top of the page.
(For the window mask shown previously, I combined a circle and cube mask to create the arched window shape.)
If you want multiple masks you just have to duplicate the controller empty, duplicate the mask nodes, pick the new empty in the Texture Coordinate node, and add the masks together.
Subtracting the masks from each other instead of adding is how you can start to get different boolean effects.
Closing Thoughts
And that's it! The trickiest part in this will probably be getting your head around the maths involved with manipulating the Object Coordinates. The best thing to do is read a bit about SDF shapes, learn a few of the definitions for the mathemetical operations the nodes use, and to enable the nodes one by one to see how each one affects the result.
It's not all positives though—there are some things to consider when deciding whether to pick 'material booleans' over 'classic' booleans:
- One advantage is that you can retain instancing, and it is going to be as responsive as Cycles is on your machine.
- One thing you may find disadvantageous is that you can see the 'boolean' only in rendered viewport mode. If that matters to you, then this may not be the technique to choose.
- Another disadvantage is that, because light paths are now potentially travelling through many surfaces, you need a relatively high number of transparent bounces. Fortunately Cycles allows transparent bounces to be set independently from all the other bounces, and, as you can see from the examples on this page, it still responds well on my machine, but your mileage may vary.
- One final disadvantage is that there are sometimes artefacts at the edge of the mask where the mask and the surface start intersecting. It's a bit like z-fighting, and I haven't found a way to mitigate it, but it's only sometimes noticeable.
Anyway I hope some of this was useful. I'm looking forward to a few month's time where I find that this technique has some terrible consequence and I have to backtrack on everything I've said, but for the meantime I will continue to use it.
Ray.